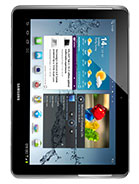
How to Update Galaxy Tab 2 10.1 P5100 with Android 4.1.1 XXCLL2 Jelly Bean Official Firmware

Posted by Unknown Jumat, 19 April 2013 0 komentar
Samsung has rolled out Android 4.1.1 Jelly Bean update with base firmware XXCLL2 for the international 3G + Wi-Fi version of the Galaxy Tab 2 10.1 with model number GT-P5100. This update is currently available for the Galaxy Tab 2 10.1 users from Southeast Asia countries - Indonesia, Malaysia, Philippines, Singapore, Vietnam, and Thailand.

Firmware details
PDA: P5100XXCLL2
CSC: P5100OLBCLL2
Version: Android 4.1.1
Built date: December, 2012
Regions: Indonesia, Malaysia, Philippines, Singapore, Vietnam, Thailand

The Galaxy Tab 2 10.1 users who fail to upgrade their devices with Android 4.1.1 XXCLL2 Jelly Bean via official method for being region specific, may follow our step-by-step guide to install the update manually.

Pre-requisites
1. Install USB Driver for Samsung Galaxy Tab 2 10.1 on the computer.
2. Enable USB Debugging Mode.
3. Make a backup of all your important data before following the guide.
4. The Galaxy Tab 2 10.1 should be factory unlocked and not locked to any particular carrier.
5. Ensure the battery of the tsblet is charged more than 80 per cent.
6. The Android 4.1.1 XXCLL2 Jelly Bean firmware is compatible only with Samsung Galaxy Tab 2 10.1 P5100 and installing this on any incorrect variant will brick the device. Therefore, verify the model number of the Galaxy Tab 2 10.1 by navigating to Settings >> About Phone.

Files Required
1. Android 4.1.1 XXCLL2 Jelly Bean Firmware for Galaxy Tab 2 10.1 P5100
2. Odin 3.07 (Mirror Link)

Steps to Update Galaxy Tab 2 10.1 P5100 with Android 4.1.1 XXCLL2 Jelly Bean Firmware
Step 1: Extract Firmware zip file that you downloaded already from above link, you will get a .tar.md5 file and some other files.
Step 2: Extract Odin zip file and you will get Odin3 v3.07.exe along with few other files.
Step 3: Power off your tablet. Wait 5-6 seconds for vibration to confirm complete switch off.
Step 4: Boot the device into Download Mode by pressing and holding Volume Down and Power buttons together until the device turns on. Then press the Volume Up button to enter Download Mode.
Step 5: Run Odin on the computer as an Administrator.
Step 6: Connect the Galaxy Tab 2 10.1 to the computer using USB cable while it is in the Download Mode. Wait until Odin detects the device. When the device is connected successfully, the ID: COM box will turn yellow with the COM port number. Additionally, the successful connected will be indicated by a message saying Added. If Odin fails to detect the device then re-install USB driver.
Step 7: Choose the following files in Odin from extracted P5100XXCLL2 firmware folder by using respective checkboxes:
  • Select the PDA checkbox, and choose the file named .tar or .md5.
  • Click the Phone checkbox, and choose the file with 'modem' in its name (ignore if there is no such file)
  • Click the CSC checkbox, and select the file with 'csc' in its name (ignore if such file is missing)
  • Choose the PIT checkbox, and choose the .pit file. Use only the file obtained during extracting in step 1 above, otherwise ignore it.
Step 8: In Odin, enable Auto Reboot and F. Reset Time checkboxes. Also, ensure the Re-Partition checkbox is chosen only if a .pit file was chosen in the previous step.
Step 9: Verify everything suggested in Step 7 and Step 8 is done correctly. Then hit the START button to begin the flashing process.
Step 10: Once flashing completed, your tablet will restart and soon you will see a PASS message with green background in the left-most box at the very top of the Odin. You can now unplug the USB cable to disconnect your device from computer.

Samsung Galaxy Tab 2 10.1 P5100 should be now updated with official Android 4.1.1 XXCLL2 Jelly Bean. Head over to Settings >> About Phone to verify the software version running on the device.

Note: If Galaxy Tab 2 10.1 P5100 stuck at booting animation after Step 10 then go to recovery mode (press and hold the Volume Up and Power buttons together) and perform Wipe data/Factory Reset and Wipe Cache Partition task before selecting reboot system now function. In recovery mode use Volume keys to navigate between options and Power key to select the option. Please note, performing wiping task will erase your device internal memory data and not external SD card data.

Click here to know How to Root Galaxy Tab 2 10.1 P5100 running on Android 4.1.1 XXCLL2 Jelly Bean firmware.

Baca Selengkapnya ....

Anonymous Animals in Google Drive

Posted by Unknown 0 komentar
Google found a funny way to show the anonymous persons who open a document in Google Drive. Instead of only using different colors for each person, Google Drive associates each person with an animal, so you'll see things like "anonymous anteater", "anonymous moose", "anonymous chupacabra", "anonymous axolotl", "anonymous kraken", "anonymous gopher", "anonymous jackalope". Google also uses special icons for each animal.

For the moment, this only works for PDF files, photos, videos and other files that can't be edited using Google's apps.


To test this feature, click a random photo from this folder and click the "open" button.


Here's the list: alligator, anteater, armadillo, auroch, axolotl, badger, bat, beaver, buffalo, camel, chameleon, cheetah, chipmunk, chinchilla, chupacabra, cormorant, coyote, crow, dingo, dinosaur, dolphin, duck, elephant, ferret, fox, frog, giraffe, gopher, grizzly, hedgehog, hippo, hyena, jackal, ibex, ifrit, iguana, koala, kraken, lemur, leopard, liger, llama, manatee, mink, monkey, narwhal, nyan cat, orangutan, otter, panda, penguin, platypus, python, pumpkin (sic!), quagga, rabbit, raccoon, rhino, sheep, shrew, skunk, slow loris, squirrel, turtle, walrus, wolf, wolverine, wombat. Missing anything?

{ Thanks, Yu-Hsuan Lin. }

Baca Selengkapnya ....

Blogger Comments Powered by Google+

Posted by Unknown 0 komentar
I don't know if you've notice, but this blog's comments look different. That's because I've switched to the new Google+ Comments feature for Blogger.


The upgraded commenting system preserves the existing comments, but the future comments require a Google+ account. That means, visitors can no longer post comments anonymously, using an OpenID account or using a Google account that hasn't been upgraded to Google+. When posting a comment, visitors can also share it on Google+. The new commenting system doesn't just show the comments posted on Blogger, it also shows all the Google+ messages that link to the post and their comments.

Just like Disqus, Google+ Comments shows by default the best comments and there's an option to show the most recent comments. It's not clear how Google determines the top comments, but the number of +1s could be one of the signals. You can also restrict the comments to the people from your Google+ circles.

Bloggers will notice some other changes: the comment management feature from Blogger is no longer available and you can only manage comments for each post. That's a significant downside, especially if you receive a lot of comments. When one of your posts receive new comments, you'll see a notification in the Google bar and you'll get an email notification. I haven't found a way to disable these notifications, not even from the Google+ settings page.

How to enable Google+ Comments if you have a Blogger blog? "Google+ Comments is available for Blogger users who have created a Google+ profile and connected it with their blog. If you haven't upgraded your Blogger profile to a Google+ profile and would like to, you can start the process by clicking the Google+ tab on the Blogger dashboard. Once your blogs are linked to a Google+ profile, a new 'Use Google+ Comments' setting will be displayed on the Google+ tab of your blog," explains Google. If your blog has a heavily modified template, you may need to reset widgets or use the code from this page.

There are additional limitations: Google+ Comments is not available for private blogs and for blogs with adult content. This means that the old commenting system will continue to be available as long as Blogger supports these kinds of blogs. You can always disable Google+ Comments and go back to the legacy Blogger commenting system.

It's important to point out that Google+ Comments are embedded as an iframe (the URL starts with https://plusone.google.com/_/widget/render/comments) and the comments are no longer included inside the Blogger page. Google manages to index content from iframes, but the change could affect your Google rankings.

Another interesting thing: it's the first time when the official Google Blog has comments.

Some early thoughts:

* Blogger is now more relevant, it's less likely that it will be discontinued in the next few years

* Blogger finally has a modern commenting system

* Google+ Comments will be available for other blogging platforms

* "sign in with Google+" will make Google+ even more popular as an identity service.

Baca Selengkapnya ....

How to Root Galaxy Tab 2 7.0 P3100 on Android 4.1.2 XXCMA4 Jelly Bean Firmware

Posted by Unknown Kamis, 18 April 2013 0 komentar
Android 4.1.2 Jelly Bean Over-The-Air (OTA) update with base firmware XXCMA4 has been released for the international version of Samsung Galaxy Tab 2 7.0 bearing model number GT-P3100. This update is currently available for the Galaxy Tab 2 7.0 users from Southeast Asia countries including Indonesia, Malaysia, Philippines, Singapore, Vietnam, and Thailand.

Samsung Galaxy Tab 2 7.0 P3100 users who have already updated their devices with Android 4.1.2 XXCMA4 Jelly Bean firmware, may root their devices using the tutorial below.

This tutorial uses CF-Auto-Root file released by recognised XDA Developers, Chainfire. The CF-Auto-Root file allowing Galaxy Tab 2 7.0 users to root their devices easily.

Disclaimer: Rooting voids the warranty of your device. We and the developer of this rooting procedures shall not be held responsible if any undesirable outcomes may happen to your device. use of this root guide is solely at your own risk!

Pre-requisite
1) Install USB Driver for Samsung Galaxy Tab 2 7.0 on your computer.
2) Enable USB Debugging Mode on the phone by navigating to Settings >> Developer Options (Android 4.0 or later) or go to Settings >> Applications >> Development (Android 2.3 or earlier).
3) Make a backup of all your important data before following the guide.
4) Ensure the battery of the tablet is charged more than 80 per cent.
5) The CF-Auto-Root file works only on Samsung Galaxy Tab 2 7.0 P3100. Applying this on any incorrect variant will brick the device. Verify the model number of the Galaxy Tab 2 7.0 by navigating to Settings >> About Phone.

Steps to Root Galaxy Tab 2 7.0 P3100 Running on Android 4.1.2 XXCMA4 Jelly Bean Firmware
Step 1: Download CF-Auto-Root package for Galaxy Tab 2 7.0 to your computer. Extract the downloaded zip file, you will get a file with .tar extension under the extracted folder
Step 2: Download Odin 3.07 (Mirror Link) and extract the zip file
Step 3: Switch off the tablet and place it into Download Mode. To do so press and hold Volume Down and Power buttons together. A warning screen sill arrive, then press Volume Up button to enter into Download Mode
Step 4: Run Odin on your computer
Step 5: Connect the tablet to the computer using the USB cable while the device is in the Download Mode. A message saying Added will arrive under Odin's message box in the bottom left. You will also get to see COM port with a number in Yellow when the tablet is connected to the computer successfully
Step 6: In Odin click the PDA button and select CF-Auto-Root-espressorf-espressorfxx-gtp3100.tar.md5 file
Step 7: Ensure Auto Reboot and F.Reset Time checkboxes are selected in Odin
Step 8: Click the Start button in Odin to begin the installation process
Step 9: Once the flashing process is completed, the tablet will automatically restart and soon you should see a Pass message with green background in the extreme-left box at the top of the Odin. You may now safely unplug the USB cable from the tablet to disconnect it from the computer

Your Samsung Galaxy Tab 2 7.0 P3100 running on Android 4.1.2 XXCMA4 Jelly Bean firmware is now rooted successfully. You may now install any app that requires root permission.

Thank's to all fellas at XDA who first tried out this rooting technique. This root method was originally posted via XDA-Developers original thread.

Baca Selengkapnya ....

How to Update Galaxy Tab 2 7.0 P3100 with Android 4.1.2 XXCMA4 Jelly Bean Official Firmware

Posted by Unknown 0 komentar
Samsung has started rolling out the Android 4.1.2 Jelly Bean on the Galaxy Tab 2 7.0 (GT-P3100). This update is currently available for the Galaxy Tab 2 7.0 users from Southeast Asia countries - Indonesia, Malaysia, Philippines, Singapore, Vietnam, and Thailand.

Firmware details
PDA: P3100XXCMA4
CSC: P3100QLBCMA3
Version: Android 4.1.2
Built date: February, 2013
Regions: Indonesia, Malaysia, Philippines, Singapore, Vietnam, Thailand (La Fleur)

The Galaxy Tab 2 7.0 users who fail to upgrade their devices with Android 4.1.2 Jelly Bean using official method, may follow our step-by-step guide to update manually.

Pre-requisite
1) Install USB Driver for Samsung Galaxy Tab 2 7.0 on your computer.
2) Enable USB Debugging Mode. [Press Menu >> Settings >> Applications. From there navigate and tap on Development option and ensure the USB Debugging is turned on.]
3) Make a backup of all your important data before following the guide.
4) Ensure the battery of the tablet is charged more than 80 per cent.
5) Your tablet should be factory unlocked.

Steps to Update Android 4.1.2 XXCMA4 Jelly Bean on Galaxy Tab 2 7.0 P3100
Step 1: Download Android 4.1.2 XXCMA4 Jelly Bean for Galaxy Tab 2 7.0 P3100 to your computer. You should get a .tar file along with some other files while extracting the firmware zip file
Step 2: Download Odin 3.07 (Mirror Link) and extract the zip file
Step 3: Power off the Galaxy tablet and enter into Download Mode by pressing and holding the Volume Down and Power buttons together. Then press the Volume up button to continue enter into Download Mode
Step 4: Run Odin on the computer
Step 5: Plug in the USB cable to the Galaxy tablet to connect it with the computer. A message saying 'Added' will arrive under Odin's message box. You should also see COM port with a number in Yellow if the device is successfully connected
[Note: In case you do not see the Added message, then try another USB port. If that does not work too then reinstall USB driver.]
Step 6: Select the files, in the order mentioned below, which you have extracted from P3100XXCMA4 folder
  • Click the PDA button and select the .tar.md5 file with Code in its name (Required)
  • Click the Phone button and select file with Modem in its name (Optional)
  • Click the CSC button and select file with CSC in its name (Optional)
  • Click the PIT button and select the .pit file (Optional)
Step 7: In Odin window, ensure Auto Reboot and F.Reset Time checkboxes are selected. In case you are using a .pit file, then make sure Re-Partition checkbox is also selected
Step 8: Click the Start button in Odin to begin the installation
Step 9: After the installation process is completed, you should see a 'Pass' message with green background in the extreme left box at the top of Odin. The tablet will then automatically reboot and soon you should see the Samsung logo. You may safely unplug the USB cable from the tablet to disconnect it from the computer
[Note: If the Galaxy Tab gets stuck at booting animation (after step-9) then head over to recovery mode and perform data wiping task by selecting Wipe Data/factory Reset and then select Reboot System now.]

Android 4.1.2 XXCMA4 official Jelly Bean firmware is now installed and running on your Galaxy Tab 2 7.0 P3100. Head over to Settings >> About Tablet to verify the software version on your device.

Click here to know How to Root Galaxy Tab 2 7.0 P3100 running on Android 4.1.2 XXCMA4 Jelly Bean firmware.

Baca Selengkapnya ....

Google Babel in Gmail

Posted by Unknown Rabu, 17 April 2013 0 komentar
As Droid Life previously reported, Google already tests Babel, an unified messaging service that combines Google Talk, Gmail Chat, Google+ Messenger. There's a Gmail page that mentions "dogfooding Babel in Gmail" and it's supposed to be available only to Google employees.


"Upgrade Chat to Babel! Babel is Google's new messenger with clients for Android, iOS, Chrome, Google+ and Gmail. Access the same conversation list from anywhere!" That's how Google describes the new service.

"Some of the new features:

* A new, conversation-based UI
* Advanced group conversations
* Send pictures
* Improved notifications across devices."

It looks like you can go back to the Gmail Chat interface: "You're about to revert the Babel chat client to the old Gmail chat client. You can always opt in back from the chat roster menu."

Here's a screenshot (it's this image):


{ Thanks, F. }

Baca Selengkapnya ....

How Google Quick View Works

Posted by Unknown 0 komentar
I've mentioned in the previous post that Google launched a feature called Quick View that's designed to load search results faster on mobile devices. Right now, the feature only works for Wikipedia results and you'll only see it if you use google.com in English.


It's interesting to see how this feature works, especially when you consider Google's claim that pages load in less than 0.1 seconds. Like a magician, Google uses tricks to make people think that pages load faster than they really do.

All the Wikipedia results with a blue "Quick View" button have special sections in Google's source code that include the first part of the articles. When you tap the "Quick View" result, the article appears to load instantly, but you only see the first paragraphs, which are included in Google's code, just like snippets. Google loads in the background the rest of the article: it's a simplified version of the mobile Wikipedia article from the Google Cache. An example of page that includes the second part of a Wikipedia article: http://websearch-experiments.googleusercontent.com/B/08/d88ede51537960e3_926bb07ecb8a2bc1.htm.

Here's what happens if Google can't load the rest of the article: you get the error message "Error loading the entire article. Try again".


But is Quick View really fast? I've loaded the Wikipedia article about lettuce in the desktop Chrome and changed the user-agent to Galaxy Nexus/Android 4.0.2. Here are the load times obtained from Chrome's developer tools (I've only included the results for the main HTML file, the images are loaded from Wikipedia's site even when you use Quick View).

- Quick View: 120 ms


- Regular Wikipedia article: 522 ms


I've tested many other articles and Quick View pages consistently loaded in 100-130 milliseconds, while the original Wikipedia articles loaded about 4 times slower. It's a significant difference, especially if you use a slow mobile Internet connection with high latency.

Another improvement is that Google's search results pages already include the necessary CSS and JavaScript code for Wikipedia, while Wikipedia loads additional files: one CSS file and 7 JavaScript files.


Here's the total loading time for the page and its resources:

- QuickView: 30 requests, 143 KB transferred, 986ms total loading time

- Wikipedia: 36 requests, 296 KB transferred, 1.68 s total loading time

Baca Selengkapnya ....
Trik SEO Terbaru support Online Shop Baju Wanita - Original design by Bamz | Copyright of android on pc.