Restrict Chrome's Omibox Suggestions to Web Searches

Posted by Unknown Rabu, 02 Oktober 2013 0 komentar
What to do if you only want to see web search suggestions in Chrome's omnibox, not suggestions from Google's top results, your bookmarks, your browsing history or previously typed URLs. Type ? in the omnibox and then start typing your query. You can also use these keyboard shortcuts: Ctrl+K or Ctrl+E for Windows and Linux, ⌘-Option-F for Mac.


Chrome will still show suggestions from your previous searches. If you use this trick in the incognito mode, Chrome will only show suggestions from your search history.

Baca Selengkapnya ....

Add a Keyboard Shortcut for Chrome's App Launcher

Posted by Unknown 0 komentar
I'm not sure why Chrome's app launcher doesn't have a keyboard shortcut, but it's pretty easy to add one. For Windows XP, right-click the desktop shortcut for Chrome App Launcher and select "Properties", go to the "Shortcut key" field and enter a keyboard shortcut. If you use Windows 7 or 8, press Shift while right-clicking the colorful grid icon from the taskbar, select "Properties", go to the "Shortcut key" field and enter a keyboard shortcut. I picked Ctrl+Shift+A.


Now I can just press Ctrl+Shift+A and the launcher will show up. I can type a Google query, the first letters from a Chrome app or just use the arrow keys to pick an app.


Google now even shows suggestions from the Chrome Web Store, so you can quickly install apps without visiting the store. I wouldn't recommend doing that, unless you really trust the app. For example, you can search for "gmail" and quickly install Gmail Offline.

Baca Selengkapnya ....

Google's Hardware Projects: Amazon Best Sellers

Posted by Unknown 0 komentar
Who knew that Google can create successful hardware? Who knew that Chromebooks could become the best selling computers at Amazon.com? Who knew that Nexus devices could become popular?

Electronics best seller - Chromecast


Laptops best seller - Samsung Chromebook


Most popular laptops under $500 - #1: Samsung Chromebook, #3: Acer Chromebook


Most wished for electronics - #1: Chromecast, #6: Samsung Chromebook


Tablets best sellers - #3: Nexus 7


So what are the reasons why Google's hardware projects are suddenly successful? OEM partners like Samsung, Acer and Asus, low prices, high-quality hardware, the focus on user experience, Google Play and the popularity of Chrome and Android.

Baca Selengkapnya ....

Google and Brandy: A Sober Mistake

Posted by Unknown 0 komentar
When you search Google for [brandy] or [brandy drinks], you'll get a Knowledge Graph card with information from Wikipedia: "Brandy is a spirit produced by distilling wine. Brandy generally contains 35–60% alcohol by volume and is typically taken as an after-dinner drink." Unfortunately, the photo that illustrates the card is not appropriate: it shows the popular singer Brandy, not the alcoholic beverage.


The photo is from an article about drinks and the caption says: "If this is the first brandy you think of, you need to get out more". Well, this shows that Google's algorithms are far from perfect.

{ Thanks, Sébastien Izouaouen, Sushubh Mittal and Max Kemman. }

Baca Selengkapnya ....

Chrome's System-Level Installer, Now Default

Posted by Unknown 0 komentar
When Chrome was released 5 years ago, many people were surprised to see that the browser didn't install in the Program Files folder. Chrome was Windows-only back then and Google wanted to make sure that users can install Chrome, even if they don't use admin accounts. Per-user installs worked well, but Google had to create a separate system-level MSI installer for enterprise.

Now it looks like Chrome has a smart Windows installer that combines both approaches. The setup file tries to install Chrome in the Program Files folder and switches to the AppData folder if it fails.


"We did change the download page to install system-level by default (and fall back to user level if that fails or the user says "no" to the UAC prompt). Installing in AppData was never a security measure, it was for convenience to make sure people could install Chrome even without admin rights. Our data shows that *preferring* a system level (Program Files) install with a fallback to user level improves the install success rate," said Mark Larson from Google.

Apparently, this is a feature launched last year, but I haven't noticed it until today, when I had to reinstall Chrome because of this error: "Update failed (error: 7) An error occurred while checking for updates: This computer already has a more recent version of Google Chrome. If the software is not working, please uninstall Google Chrome and try again."


Chrome's help center still recommends to use an alternate installer "to install Google Chrome for all user accounts on a Windows computer. By doing so, you'll replace all other versions of Chrome that may already be installed on your computer for other user accounts." For Mac, "you can install Chrome for all user accounts on your computer if you're signed in as an administrator."

Baca Selengkapnya ....

Google's Reverse Image Search, Now in Chrome

Posted by Unknown 0 komentar
Google's reverse image search feature is about to become more popular, now that you can easily use it in Chrome 30+. You no longer have to install an extension, just right-click an image and click "search Google for this image".

"Search by image allows you to do a reverse image search and discover all sorts of content that's related to a specific image. For example, search using a picture of your favorite band and see search results that might include similar images, webpages about the band, and even sites that include the same picture," explains Google.


It's interesting to notice that Google uploads the image, instead of using the URL. Maybe Google wanted to make sure that you'll always get some results: not all the URLs are publicly accessible (for example: Gmail's image attachments).

Reverse image search also works for modified versions of an image, so you can use it to find more information about an image, other sites that include the image, the original source of an image. You can also use TinEye, a similar reverse image search engine.

Baca Selengkapnya ....

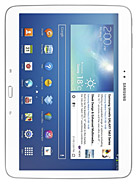
How to Update Galaxy Tab 3 10.1 P5200 with Android 4.2.2 XXUBMI5 Jelly Bean Official Firmware

Posted by Unknown Selasa, 01 Oktober 2013 0 komentar
Samsung has recently released the Android 4.2.2 Jelly Bean update for the 3G + Wi-Fi version of Galaxy Tab 3 10.1 (GT-P5200) in Southeast Asian countries. The new official update is now available as an Over-The-Air (OTA) update as well as through Samsung KIES.

Firmware details
PDA: P5200XXUBMI5
CSC: P5200OLBBMH3
MODEM: P5200DXAMF6
Version: Android 4.2.2
Build date: Sep 21, 2013
Regions: Indonesia, Malaysia, Philippines, Singapore, Vietnam, Thailand

Samsung Galaxy Tab 3 10.1 P5200 users who missed the OTA update notification or unable to access the update over Samsung KIES, may follow our step-by-step guide to install the update manually.

Pre-requisites
1. Install USB Drivers for Samsung Galaxy Tab 3 10.1 on the computer.
2. Enable USB Debugging Mode on the device by navigating to Settings >> Developer Options.
3. Make a backup of all your important data before following the guide.
4. The Galaxy Tab 3 10.1 should be factory unlocked and not locked to any particular carrier.
5. Ensure the battery of the device is charged more than 80 percent.
6. The Android 4.2.2 XXUBMI5 Jelly Bean firmware is compatible only with the 3G + Wi-Fi version of Samsung Galaxy Tab 3 10.1 with model number GT-P5200. Applying this to any incorrect variant might brick the device. Verify the model number of the Galaxy Tab 3 10.1 by navigating to Settings >> About Phone.

Files Required
1. Android 4.2.2 XXUBMI5 Jelly Bean Firmware (Mirror Link)
2. Odin 3.07 (Mirror Link)

Steps to Update Galaxy Tab 3 10.1 P5200 with Android 4.2.2 XXUBMI5 Jelly Bean Firmware
Step 1: Extract Firmware zip file using WinRAR/7-Zip/WinZip or any other extracting tool, you will get a .tar.md5 file and some other files (optional).
Step 2: Extract Odin zip file and you will get Odin3 v3.07.exe along with few other files.
Step 3: Switch off Galaxy Tab 3 10.1.
Step 4: Boot the device into Download Mode by pressing and holding Volume Down and Power buttons together until a construction Android robot icon with a warning triangle appears on screen. Now press the Volume Up button to enter Download Mode.
Step 5: Run Odin on the computer as an Administrator.
Step 6: Connect the Galaxy Tab 3 10.1 to the computer using USB cable while it is in the Download Mode. Wait until Odin detects the device. When the device is connected successfully, the ID: COM box will turn to light blue with the COM port number. Additionally, the successful connected will be indicated by a message saying Added.

Note: If the Added message does not appear, then try re-install USB drivers or changing the port on the computer.

Step 7: Select the following files in Odin from extracted P5200XXUBMI5 firmware folder:
  • Click the PDA button and select the .tar.md5 file.
  • Click the Phone button and select file with MODEM in its name. Ignore if there is no such file.
  • Click the CSC button and select file with CSC in its name. Ignore if there is no such file.
  • Click the PIT button and select the .pit file. Ignore if there is no such file.
Step 8: In Odin, enable Auto Reboot and F. Reset Time checkboxes. Also, ensure the Re-Partition checkbox is chosen only if a .pit file was chosen in the previous step.
Step 9: Verify everything suggested in Step 7 and Step 8 is done correctly. Then hit the Start button to begin the installation process.
Step 10: Once the installation process is completed, your device will restart and soon you will see a PASS message with green background in the left-most box at the very top of the Odin. You can now unplug the USB cable to disconnect your device from the computer.

Samsung Galaxy Tab 3 10.1 P5200 should be now updated with official Android 4.2.2 XXUBMI5 Jelly Bean. Head over to Settings >> About Phone to verify the software version running on the device.

Note: If Galaxy Tab 3 10.1 P5200 stuck at booting animation after Step 10 then go to recovery mode (press and hold the Volume Up and Power buttons together) and perform Wipe data/Factory Reset and Wipe Cache Partition task before selecting reboot system now function. In recovery mode use Volume keys to navigate between options and Power key to select the option. Please note, performing wiping task will erase your device internal memory data and not external SD card data.

Click here to know How to Root Galaxy Tab 3 10.1 P5200 running on Android 4.2.2 Jelly Bean firmware.

Baca Selengkapnya ....
Trik SEO Terbaru support Online Shop Baju Wanita - Original design by Bamz | Copyright of android on pc.