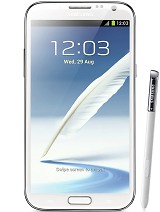
How to Root Galaxy Note 2 N7100 on Android 4.1.2 XXDMD2 Jelly Bean Firmware

Posted by Unknown Kamis, 02 Mei 2013 0 komentar
Samsung Galaxy Note 2 N7100 users who have already updated their devices with Android 4.1.2 XXDMD2 Jelly Bean firmware, may root their devices using the tutorial below.

This tutorial uses CF-Auto-Root file released by recognised XDA Developers, Chainfire. The CF-Auto-Root file allowing Galaxy Note 2 users to root their devices easily without depending on the firmware. It completely supports Android 4.1.2 Jelly Bean and future firmware as well.

Disclaimer: Rooting voids the warranty of your device. We and the developer of this rooting procedures shall not be held responsible if any undesirable outcomes may happen to your device. use of this root guide is solely at your own risk!

Pre-requisites
1. Install USB Driver for Samsung Galaxy Note on the computer.
2. Enable USB Debugging Mode on the phone.
3. Make a backup of all your important data before following the guide.
4. The Galaxy Note 2 should be factory unlocked and not locked to any particular carrier.
5. Ensure the battery of the phone is charged more than 80 per cent.
6. The CF-Auto-Root file works only on Samsung Galaxy Note 2 N7100. Applying this on any incorrect variant will brick the device. Verify the model number of the Galaxy Note 2 by navigating to Settings >> About Phone.

File Required
1. CF-Auto-Root for Galaxy Note 2 N7100  (CF-Auto-Root-t03g-t03gxx-gtn7100.zip)
2. Odin 3.07

Steps to Root Galaxy Note 2 N7100 on Android 4.1.2 XXDMD2 Jelly Bean
Step 1: Extract downloaded CF-Auto-Root zip file and you will find a .tar.md5 file within it.
Step 2: Extract Odin zip file and you will get Odin3 v3.07.exe along with few other files.
Step 3: Power off your phone. Wait 5-6 seconds for vibration to confirm complete switch off.
Step 4: Boot the device into Download Mode by pressing and holding Volume Down + Home buttons together and then press the Power button until the device turns on. Now press the Volume Up button to enter Download Mode.
Step 5: Run Odin on the computer as an Administrator.
Step 6: Connect the Galaxy Note 2 to the computer using USB cable while it is in the Download Mode. Wait until Odin detects the device. When the device is connected successfully, the ID: COM box will turn yellow with the COM port number. Additionally, the successful connected will be indicated by a message saying Added. If Odin fails to detect the device then re-install USB driver.
Step 7: Select these files in Odin at respective buttons:
  • Click the PDA Button, and select CF-Auto-Root-t03g-t03gxx-gtn7100.tar.md5.
Step 8: In Odin, enable Auto Reboot and F. Reset Time checkboxes. Also, ensure the Re-Partition checkbox is chosen only if a .pit file was chosen in the previous step.
Step 9: Verify everything suggested in Step 7 and Step 8 is done correctly. Then hit the START button to begin the flashing process.
Step 10: Once flashing completed, your phone will restart and soon you will see a PASS message with green background in the left-most box at the very top of the Odin. You can now unplug the USB cable to disconnect your device from computer.

Your Samsung Galaxy Note 2 N7100 running on Android 4.1.2 XXDMD2 Jelly Bean firmware is now rooted successfully. You may now install any app that requires root permission.

Thank's to all fellas at XDA who first tried out this rooting technique. This root method was originally posted via XDA-Developers original thread.

Baca Selengkapnya ....

How to Update Galaxy Note 2 N7100 with Android 4.1.2 XXDMD2 Jelly Bean Official Firmware

Posted by Unknown 0 komentar
Samsung has started rolling out the Android 4.1.2 Jelly Bean update with base firmware XXDMD2 for the Galaxy Note 2 GT-N7100. This official update is currently available for download via Over-The-Air (OTA) update as well as through Samsung KIES, for the Galaxy Note 2 users from Southeast Asia countries.

Firmware details
PDA: N7100XXDMD2
CSC: N7100OLBDMD2
Version: Android 4.1.2
Built date: April, 2013
Regions: Indonesia, Malaysia, Philippines, Singapore, Vietnam, Thailand

The Galaxy Note 2 users who fail to upgrade their devices with Android 4.1.2 Jelly Bean using official method for being region specific, may follow our step-by-step guide to install the update manually.

Pre-requisites
1. Install USB Driver for Samsung Galaxy Note on the computer.
2. Enable USB Debugging Mode.
3. Make a backup of all your important data before following the guide.
4. The Galaxy Note 2 should be factory unlocked and not locked to any particular carrier.
5. Ensure the battery of the phone is charged more than 80 per cent.
6. The Android 4.1.2 XXDMD2 Jelly Bean firmware is compatible only with Samsung Galaxy Note 2 N7100 and installing this on any incorrect variant will brick the device. Therefore, verify the model number of the Galaxy Note 2 by navigating to Settings>> About Phone.

File Required
1. Android 4.1.2 XXDMD2 Jelly Bean Firmware
2. Odin 3.07

Steps to Update Galaxy Note 2 N7100 with Android 4.1.2 XXDMD2 Jelly Bean Firmware
Step 1: Extract Firmware zip file that you downloaded already from above link, you will get a .tar.md5 file and some other files.
Step 2: Extract Odin zip file and you will get Odin3 v3.07.exe along with few other files.
Step 3: Power off your phone. Wait 5-6 seconds for vibration to confirm complete switch off.
Step 4: Boot the device into Download Mode by pressing and holding Volume Down + Home buttons together and then press the Power button until the device turns on. Now press the Volume Up button to enter Download Mode.
Step 5: Run Odin on the computer as an Administrator.
Step 6: Connect the Galaxy Note 2 to the computer using USB cable while it is in the Download Mode. Wait until Odin detects the device. When the device is connected successfully, the ID: COM box will turn yellow with the COM port number. Additionally, the successful connected will be indicated by a message saying Added. If Odin fails to detect the device then re-install USB driver.
Step 7: Choose the following files in Odin from extracted N7100XXDMD2 firmware folder by using respective checkboxes:
  • Select the PDA checkbox, and choose the file named .tar or .md5.
  • Click the Phone checkbox, and choose the file with 'modem' in its name (ignore if there is no such file)
  • Click the CSC checkbox, and select the file with 'csc' in its name (ignore if such file is missing)
  • Choose the PIT checkbox, and choose the .pit file. Use only the file obtained during extracting in step 1 above, otherwise ignore it.
Step 8: In Odin, enable Auto Reboot and F. Reset Time checkboxes. Also, ensure the Re-Partition checkbox is chosen only if a .pit file was chosen in the previous step.
Step 9: Verify everything suggested in Step 7 and Step 8 is done correctly. Then hit the START button to begin the flashing process.
Step 10: Once flashing completed, your phone will restart and soon you will see a PASS message with green background in the left-most box at the very top of the Odin. You can now unplug the USB cable to disconnect your device from computer.

Samsung Galaxy Note 2 N7100 should be now updated with official Android 4.1.2 XXDMD2 Jelly Bean. Head over to Settings>> About Phone to verify the software version running on the device.

Note: If Galaxy Note 2 N7100 stuck at booting animation after Step 10 then go to recovery mode (press and hold the Volume Up, Home and Power buttons together) and perform Wipe data/Factory Reset and Wipe Cache Partition task before selecting reboot system now function. In recovery mode use Volume keys to navigate between options and Power key to select the option. Please note, performing wiping task will erase your device internal memory data and not external SD card data.

Click here to know How to Root Galaxy Note 2 N7100 running on Android 4.1.2 XXDMD2 Jelly Bean firmware.

Baca Selengkapnya ....

The New Chrome Apps

Posted by Unknown Rabu, 01 Mei 2013 0 komentar
Back in 2010, I wrote a post about the Chrome Web Store and the two kinds of apps that were available: hosted apps (mostly links to web apps) and packaged apps (local apps that work offline and are closer to native apps). At that time, many people complained that the apps from the Chrome Web Store are mostly bookmarks and Google didn't distinguish hosted apps from packaged apps. "Unfortunately, Google's store doesn't properly label apps, so it's difficult to find apps that work offline, apps that have a rich user interaction, apps that only live inside Chrome," I mentioned back then.


The Web Store has improved: Google started to label the apps that work offline and the two types of apps will have different names. Only packaged apps will be called "apps", while hosted apps will be called "websites".

Today's packaged apps are actually new-style packaged apps and have a lot of new features: "powerful APIs have been added so your apps can have native-like capabilities, and a serious security model is enforced to make sure these APIs are not abused." Package apps launch from outside of the browser, using the Chrome App Launcher - a new icon that will be added to the operating system's taskbar.


"Packaged apps deliver an experience as capable as a native app, but as safe as a web page. Just like web apps, packaged apps are written in HTML5, JavaScript, and CSS. But packaged apps look and behave like native apps, and they have native-like capabilities that are much more powerful than those available to web apps." The apps launch in a new window that has no chrome and no browser interface elements.


"These combine the best of websites and native applications — they're available offline & from any computer, are always up to date, and they can communicate with devices like USB drives & Bluetooth speakers," explains Google.

Here's the new Chrome Web Store interface that's displayed if you use Chrome 28 (Dev/Canary) for Windows or Chrome OS:


Install the Gliffy Diagrams app and you can use it almost instantly. Add some shapes, close the window, open Gliffy again from the App Launcher and your data is there.


"Many of these apps are works in progress, which is why we're only making them easily available on Chrome's dev channel. If you've written a packaged app, or are working on one, now is a great time to get some early feedback and polish your app before Chrome packaged apps become more broadly available," informs the Chromium Blog.

Some examples of apps: games, to-do apps, text editors, SSH clients, IRC clients, torrent clients, calculators, weather apps and more.

Baca Selengkapnya ....

Download and Sync Google Fonts to Your Computer

Posted by Unknown 0 komentar
Google's Web Fonts are really popular. Google created a directory of open source fonts that anyone can use, they're hosted by Google and it's easy to embed them. The most popular font is Open Sans, which has more than 2 billion views only for the last week.

Fonts like Open Sans, Droid Sans and Roboto are only preinstalled if you're using an Android device and there are many other fonts that aren't preinstalled, so how can you use them? "If a page uses web fonts, then the font files have to be downloaded to the site visitor's computer before they can be displayed initially. The font files are served compressed for a faster download. After that initial download, they will be cached in the browser. As the Google Fonts API becomes widely used, your visitors will be likely to already have the font you're using in their browser cache when they visit your page," explains Google.

A search for fonts.googleapis.com in Chrome's cache page (chrome://cache/) returned font families like Open Sans, Tangerine, Oswald, Noto Serif, IM Fell English, Arvo, Droid Sans.

If you want to download some of these fonts to your computer and sync them when they're updated, you can install SkyFonts, a free software for Windows and Mac OS X. "SkyFonts automatically updates the fonts installed on your system whenever they are updated on Google Fonts – for example, when new characters are added – ensuring you always have the latest fonts to work with. And with the fonts installed locally, browsing websites that use web fonts will be faster, since your browser won't have to spend time fetching font data," mentions Raziel Alvarez, from the Google Fonts team.


There are 624 font families and 1105 fonts right now, but SkyFonts only lets you download fonts one by one. It's probably a good idea to visit the Google Fonts directory, sort font families by popularity and download some of the font styles from fonts.com.

If you don't need the syncing feature, you can also download fonts from the Google Fonts site: click "Add to Collection" next to the fonts you want to download, then click the "Download" button, download the font families in your collection as a .zip file and use these instructions.

Baca Selengkapnya ....

How to Unroot Galaxy S4 I9500 on Android 4.2.2 XXUAMDE Jelly Bean Firmware

Posted by Unknown 0 komentar
Samsung Galaxy S4 I9500 users can now unroot their device to recover the phone's warranty by using this guide. In order to regain the device hardware warranty, users must install Triangle Away app to reset flash counter to zero and then follow the steps in this guide to unroot the device successfully.

Pre-requisites
1. Install USB Driver for Samsung Galaxy S4 on the computer.
2. Enable USB Debugging Mode.
3. Make a backup of all your important data before following the guide.
4. The Galaxy S4 should be factory unlocked and not locked to any particular carrier.
5. Ensure the battery of the phone is charged more than 80 per cent.
6. The Android 4.2.2 XXUAMDE Jelly Bean firmware is compatible only with Samsung Galaxy S4 I9500 and installing this on any incorrect variant will brick the device. Therefore, verify the model number of the Galaxy S4 by navigating to Settings>> About Phone.

File Required
1. Android 4.2.2 I9500XXUAMDE Jelly Bean Firmware
2. Odin 3.07

Steps to Unroot Galaxy S4 I9500 on Android 4.2.2 XXUAMDE Jelly Bean Firmware
Step 1: Extract Firmware zip file that you downloaded already from above link, you will get a .tar.md5 file and some other files.  
Step 2: Extract Odin zip file and you will get Odin3 v3.07.exe along with few other files.  
Step 3: Power off your phone. Wait 5-6 seconds for vibration to confirm complete switch off. 
Step 4: Boot the device into Download Mode by pressing and holding Volume Down + Home buttons together and then press the Power button until the device turns on. Now press the Volume Up button to enter Download Mode.
Step 5: Run Odin on the computer as an Administrator.
Step 6: Connect the Galaxy S4 to the computer using USB cable while it is in the Download Mode. Wait until Odin detects the device. When the device is connected successfully, the ID: COM box will turn yellow with the COM port number. Additionally, the successful connected will be indicated by a message saying Added. If Odin fails to detect the device then re-install USB driver.
Step 7: Choose the following files in Odin from extracted I9500XXUAMDE firmware folder by using respective checkboxes:
  • Select the PDA checkbox, and choose the file named .tar or .md5.
  • Click the Phone checkbox, and choose the file with 'modem' in its name (ignore if there is no such file)
  • Click the CSC checkbox, and select the file with 'csc' in its name (ignore if such file is missing)
  • Choose the PIT checkbox, and choose the .pit file. Use only the file obtained during extracting in step 1 above, otherwise ignore it.
Step 8: In Odin, enable Auto Reboot and F. Reset Time checkboxes. Also, ensure the Re-Partition checkbox is chosen only if a .pit file was chosen in the previous step.
Step 9: Verify everything suggested in Step 7 and Step 8 is done correctly. Then hit the START button to begin the flashing process.
Step 10: Once flashing completed, your phone will restart and soon you will see a PASS message with green background in the left-most box at the very top of the Odin. You can now unplug the USB cable to disconnect your device from computer.

Samsung Galaxy S4 I9500 running on official Android 4.2.2 XXUAMDE Jelly Bean is now Unrooted successfully. However, to get back warranty you should first use triangle away to set flash counter to zero and then follow the above steps.

Baca Selengkapnya ....

Error 404 (Not Found)!!1

Posted by Unknown 0 komentar
Jack Fellows, a reader of this blog, asked a question about Google's 404 error page: "Google changed their 404 error pages a couple of years ago now, and yet the title still says (and has from day 1) 'Error 404 (Not Found)!!1'. The exclamations marks don't look very professional anyway, but the '1' at the end looks really pants... or is it just me?!"


I don't think it's a mistake. It's probably a joke that references the "!1 phenomenon" meme. "In many cases, a string of exclamation marks followed by '1' can be read as a careless typo, though it has been increasingly used with intention to express a sense of urgency or excitement. While the configuration of QWERTY keyboard layout varies across different language zones, an exclamation point is almost always invoked by holding down the shift key and pressing the digit / symbol key (1/!). As a result, the erroneous input of '1' after a string of exclamation points became a common typo in online chat, especially when typing in haste."

On a related note, it's strange to see that Google's 404 error pages don't include useful information: a search box and a list of relevant pages. For example, when you type in the address bar www.google.com/chat, Google should suggest www.google.com/talk or this page about Gmail Chat.

Google could even use Chrome's "Oops!" pages. "Google Chrome can show suggestions for the page you were trying to reach, if it is unable to connect to the web address. Instead of a cryptic error message, you'll see suggestions to navigate to other parts of the website or to search for the page with Google."


Baca Selengkapnya ....

How to Disable Google News for Tablets

Posted by Unknown 0 komentar
If you don't like the tablet interface for Google News, there's a non-obvious way to switch to the desktop interface. Tap the "gear" button from the top-right of the page, select "Settings", uncheck "Use the new Google News (uncheck to revert to the old version)" and then tap "Save changes".


The tablet interface was launched in December 2012 and the goal was to add support for gestures. "You can find new articles, news sources, and even topics of interest with intuitive gestures. Swipe horizontally between sections – from Business to Entertainment, for example – or tap 'Explore in depth' to see multiple articles and other info related to a particular story." Google News for tablets is only available for English editions.


(<offtopic>Google Now Voice Search in a Forbes article? Really? From the article: "Google announced on Monday that the Google Now voice search capability is now available for your iPhone or iPad. The Google Now service is often compared to Apple's Siri – both are considered virtual personal assistants that will work by natural language voice commands." There are at least two mistakes: Google launched Google Now for iOS, not voice search, and Google Now has nothing to do with voice search.</offtopic>)

Baca Selengkapnya ....
Trik SEO Terbaru support Online Shop Baju Wanita - Original design by Bamz | Copyright of android on pc.